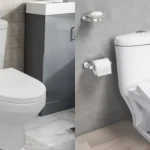
wall hung toilet - ortonbaths

How to Install a Wall-Hung Toilet: Step-by-Step Instructions

A toilet system is one of the most important things that should be selected when remodeling a bathroom or creating a new area. Of all designs, the Wall-Hung Toilet is a modern, space-saving solution that is elegant and immediately adds a sophisticated touch and use to any bathroom. With the increasing demands of homeowners and designers who want smooth cleaning and maintenance of the fixtures, wall-hung toilets are gaining popularity in modern bathrooms.

In contrast to conventional floor-standing toilets, wall-hung toilets are attached to the wall with the cistern being located behind a wall frame, producing a floating appearance, and allowing the floor to be freed up. When you are planning to install a wall-hung toilet, this detailed guide will take you through the process step by step, from preparation to the final touches, that will assist in ensuring that you have a professional-quality installation.

wall hung toilet - ortonbaths

Why Choose a Wall-Hung Toilet?

When deciding to jump into the installation process, it is worth knowing why a wall-hung toilet is a great selection.

  1. Space Saving and Open Look: A wall-hung toilet is one of the largest space-saving solutions. The bowl does not touch the floor, so the tank is hidden in the wall and hence it brings a visual opening to the bathroom area that makes even small bathrooms look bigger and more airy.
  2. Easier Cleaning: The fact that the bowl is suspended over the floor makes cleaning it a lot easier. The edges of the base are not very awkward and difficult to clean, so that dust and grime do not gather on them and that way you can have an apt bathroom with much less struggle.
  3. Contemporary, Sleek Designs: Wall-hung toilets have a sleek, modernist design, which is minimalistic and fitting to modern bathroom designs. They enhance the sophistication, whether you are updating a commercial or possibly redecorating a home.

Tools and Materials You’ll Need

Get the right equipment and materials prepared before you start on any installation. The following is what you will generally need:

  • Wall-hung toilet bowl and mounting frame kit.
  • Wall frame cistern flush tank (cistern).
  • Flush actuator plate
  • Level and measuring tape
  • Adjustable socket and Wrench.
  • Power drill with masonry bits
  • Screwdrivers (flathead and Phillips)
  • PVC adhesive (drainage and water pipes) and pipe cutter.
  • Safety gear (gloves, goggles)

It is better to prepare these beforehand and this would mean that the installation process would proceed smoothly and unwarranted delays would be avoided.

wall hung toilet - ortonbaths

Step-by-Step Installation Guide

To install a wall-hung toilet, it must be well planned and executed. The general breakdown of the installation stages is as follows:

Step 1: Plan and Mark the Wall

The first step would be to choose the place where your wall-hung toilet would be placed. The bowl height is variable and can be decided according to preference or accessibility. The middle of the toilet seat is normally mounted on an average of 15-19 inches high off the floor.

Select a pencil and a level and indicate the required installation height on the wall. This will determine how your frames will go and make your final installation spot on.

Step 2: Install the Carrier Frame

A wall-hung toilet is supported by the carrier frame. It is a robust metal frame that is supposed to hold the weight of the toilet bowl along with the hidden cistern. These frames are normally attached to the floor and the wall using bolts.

Install the carrier frame and make sure that it is absolutely level and plumb. This part should be solid, which is the frame installation, because this is where the whole weight of the toilet and the  user’s weight will be supported.

Step 3: Connect Water Supply and Drainage

After placing the frame, put the water supply line on the concealed cistern inlet. Install a water supply pipe that is of high quality and the connections are well sealed to avoid leakages. The second step is to attach the outflow of the waste of the toilet frame to the main drainage pipe of your bathroom.

This stage can include cutting and installing PVC pipes. Proper fittings and PVC glue are to be used wherever necessary, to make sure the connections are secure. Check alignment and to be sure of effective flushing and drainage.

Step 4: Attach the Toilet Bowl

The frame and plumbing has been installed, now the time has come to mount the toilet bowl. Gently and precisely place the toilet bowl frame using bolts that are protruding in the carrier frame. Insert the bowl on the bolts and use the given nuts and washers.

Consider the manufacturer instructions when they have specifications of the exact torque. Excessive tightening may crack the bowl of the toilet whereas little can cause it to be unsteady.

Step 5: Install the Flush Actuator

One of the most important functional and aesthetic elements is the flush actuator plate. This plate regulates the flushing system and is normally attached to the wall adjacent to the top of the toilet.

Install actuator plate as per the instructions of the manufacturer. Make sure the flush buttons are fitting in their mechanism with the cistern mechanism behind the wall. Before completing the wall surface, test the actuator to ensure that it works smoothly.

Step 6: Test for Leaks and Function

Test your installation to the full before covering the wall surface. Turn on the water supply and flush, repeat the process several times and check all connections in case of any leakages. Also, ensure that the rim of the toilet is firmly seated and does not protrude when stepped on.

Fix any problems prior to the completion of installation.

Step 7: Finish Wall Surface and Final Touches

After plumbing and functionality are verified, you are then free to complete your wall. The most frequent finishes are tile, veneer, or paint. Having the disguised cistern and carrier frame under the completed wall, your bathroom will now appear clean and polished.

Include any additional features like toilet paper holders or similar tiles to beautify the overall design.

Tips for a Flawless Installation

To install a wall-hung toilet successfully and with extended longevity, follow these tips used by experts:

  • Provide Structural Support: Wall-hung toilets are dependent on a correctly installed frame. Ensure that there are studs or solid support structures that the wall is mounted to.
  • Check Local Codes: Depending on the location, plumbing requirements may differ. Never install without checking local plumbing codes as this can be a costly way to do things.
  • Get a Professional (when in doubt): Although DIY installations can be rewarding, certain plumbing and construction issues might require professional assistance, particularly when you are altering the water supply or drainage lines.
  • Choose Quality Components: Select high quality fixtures and fittings that match up the industry standards to prevent future leakages, corrosion or malfunctions.
wall hung toilet ortonbaths

Why Choose Ortonbaths for Your Wall-Hung Toilet

Ortonbaths has a range of Wall-Hung Toilets that are a high-quality premium line of products that can be wall-hung to create seamless blends between aesthetics and performance, in case you are considering updating or installing a new bathroom. Accentuating the essence of high-performance sanitaryware that fits the contemporary household, health care, office and others, the products of Orton Baths are designed with the spirit of long life, easy maintenance, and prolonged use.

Orton has a variety of sleek ceramic wall-hung toilets, most of which have rimless features to increase their hygiene, as well as dual-flush technology to save on water. These toilets reflect the minimalistic design philosophy and a combination of functionality and modernism, which makes sure that your bathroom is not only beautiful but also effective.

When selecting wall-hung toilets with the Ortonbaths, you are not only fitting a toilet, but you are also making an investment in a type of toilet that emphasizes design innovations and high-quality craftsmanship.

Conclusion

The installation of a wall-hung toilet will add the latest space-saving and modern-style toilet to your bathroom, improving the appearance and performance of your toilet. Although the installation may need a lot of planning and attention to detail, this step by step guide will take you through all the necessary steps of setting up the frames and testing the installation to the first stage. Given the appropriate equipment, a little time and quality products such as those provided by Orton Baths, you will be capable of performing the installation and achieving a high-quality, sophisticated bathroom upgrade that will last the test of time.

To invest in a wall-hung toilet is not only the design, it is the necessity to make the bathroom a cleaner, more convenient, and more beautiful place to spend the next few years.
A toilet system is one of the most important things that should be selected when remodeling a bathroom or creating a new area. Of all designs, the Wall-Hung Toilet is a modern, space-saving solution that is elegant and immediately adds a sophisticated touch and use to any bathroom. With the increasing demands of homeowners and designers who want smooth cleaning and maintenance of the fixtures, wall-hung toilets are gaining popularity in modern bathrooms.

In contrast to conventional floor-standing toilets, wall-hung toilets are attached to the wall with the cistern being located behind a wall frame, producing a floating appearance, and allowing the floor to be freed up. When you are planning to install a wall-hung toilet, this detailed guide will take you through the process step by step, from preparation to the final touches, that will assist in ensuring that you have a professional-quality installation.

wall hung toilet - ortonbaths

Why Choose a Wall-Hung Toilet?

When deciding to jump into the installation process, it is worth knowing why a wall-hung toilet is a great selection.

  1. Space Saving and Open Look: A wall-hung toilet is one of the largest space-saving solutions. The bowl does not touch the floor, so the tank is hidden in the wall and hence it brings a visual opening to the bathroom area that makes even small bathrooms look bigger and more airy.
  2. Easier Cleaning: The fact that the bowl is suspended over the floor makes cleaning it a lot easier. The edges of the base are not very awkward and difficult to clean, so that dust and grime do not gather on them and that way you can have an apt bathroom with much less struggle.
  3. Contemporary, Sleek Designs: Wall-hung toilets have a sleek, modernist design, which is minimalistic and fitting to modern bathroom designs. They enhance the sophistication, whether you are updating a commercial or possibly redecorating a home.

Tools and Materials You’ll Need

Get the right equipment and materials prepared before you start on any installation. The following is what you will generally need:

  • Wall-hung toilet bowl and mounting frame kit.
  • Wall frame cistern flush tank (cistern).
  • Flush actuator plate
  • Level and measuring tape
  • Adjustable socket and Wrench.
  • Power drill with masonry bits
  • Screwdrivers (flathead and Phillips)
  • PVC adhesive (drainage and water pipes) and pipe cutter.
  • Safety gear (gloves, goggles)

It is better to prepare these beforehand and this would mean that the installation process would proceed smoothly and unwarranted delays would be avoided.

wall hung toilet - ortonbaths

Step-by-Step Installation Guide

To install a wall-hung toilet, it must be well planned and executed. The general breakdown of the installation stages is as follows:

Step 1: Plan and Mark the Wall

The first step would be to choose the place where your wall-hung toilet would be placed. The bowl height is variable and can be decided according to preference or accessibility. The middle of the toilet seat is normally mounted on an average of 15-19 inches high off the floor.

Select a pencil and a level and indicate the required installation height on the wall. This will determine how your frames will go and make your final installation spot on.

Step 2: Install the Carrier Frame

A wall-hung toilet is supported by the carrier frame. It is a robust metal frame that is supposed to hold the weight of the toilet bowl along with the hidden cistern. These frames are normally attached to the floor and the wall using bolts.

Install the carrier frame and make sure that it is absolutely level and plumb. This part should be solid, which is the frame installation, because this is where the whole weight of the toilet and the  user’s weight will be supported.

Step 3: Connect Water Supply and Drainage

After placing the frame, put the water supply line on the concealed cistern inlet. Install a water supply pipe that is of high quality and the connections are well sealed to avoid leakages. The second step is to attach the outflow of the waste of the toilet frame to the main drainage pipe of your bathroom.

This stage can include cutting and installing PVC pipes. Proper fittings and PVC glue are to be used wherever necessary, to make sure the connections are secure. Check alignment and to be sure of effective flushing and drainage.

Step 4: Attach the Toilet Bowl

The frame and plumbing has been installed, now the time has come to mount the toilet bowl. Gently and precisely place the toilet bowl frame using bolts that are protruding in the carrier frame. Insert the bowl on the bolts and use the given nuts and washers.

Consider the manufacturer instructions when they have specifications of the exact torque. Excessive tightening may crack the bowl of the toilet whereas little can cause it to be unsteady.

Step 5: Install the Flush Actuator

One of the most important functional and aesthetic elements is the flush actuator plate. This plate regulates the flushing system and is normally attached to the wall adjacent to the top of the toilet.

Install actuator plate as per the instructions of the manufacturer. Make sure the flush buttons are fitting in their mechanism with the cistern mechanism behind the wall. Before completing the wall surface, test the actuator to ensure that it works smoothly.

Step 6: Test for Leaks and Function

Test your installation to the full before covering the wall surface. Turn on the water supply and flush, repeat the process several times and check all connections in case of any leakages. Also, ensure that the rim of the toilet is firmly seated and does not protrude when stepped on.

Fix any problems prior to the completion of installation.

Step 7: Finish Wall Surface and Final Touches

After plumbing and functionality are verified, you are then free to complete your wall. The most frequent finishes are tile, veneer, or paint. Having the disguised cistern and carrier frame under the completed wall, your bathroom will now appear clean and polished.

Include any additional features like toilet paper holders or similar tiles to beautify the overall design.

Tips for a Flawless Installation

To install a wall-hung toilet successfully and with extended longevity, follow these tips used by experts:

  • Provide Structural Support: Wall-hung toilets are dependent on a correctly installed frame. Ensure that there are studs or solid support structures that the wall is mounted to.
  • Check Local Codes: Depending on the location, plumbing requirements may differ. Never install without checking local plumbing codes as this can be a costly way to do things.
  • Get a Professional (when in doubt): Although DIY installations can be rewarding, certain plumbing and construction issues might require professional assistance, particularly when you are altering the water supply or drainage lines.
  • Choose Quality Components: Select high quality fixtures and fittings that match up the industry standards to prevent future leakages, corrosion or malfunctions.
wall hung toilet ortonbaths

Why Choose Ortonbaths for Your Wall-Hung Toilet

Ortonbaths has a range of Wall-Hung Toilets that are a high-quality premium line of products that can be wall-hung to create seamless blends between aesthetics and performance, in case you are considering updating or installing a new bathroom. Accentuating the essence of high-performance sanitaryware that fits the contemporary household, health care, office and others, the products of Orton Baths are designed with the spirit of long life, easy maintenance, and prolonged use.

Orton has a variety of sleek ceramic wall-hung toilets, most of which have rimless features to increase their hygiene, as well as dual-flush technology to save on water. These toilets reflect the minimalistic design philosophy and a combination of functionality and modernism, which makes sure that your bathroom is not only beautiful but also effective.

When selecting wall-hung toilets with the Ortonbaths, you are not only fitting a toilet, but you are also making an investment in a type of toilet that emphasizes design innovations and high-quality craftsmanship.

Conclusion

The installation of a wall-hung toilet will add the latest space-saving and modern-style toilet to your bathroom, improving the appearance and performance of your toilet. Although the installation may need a lot of planning and attention to detail, this step by step guide will take you through all the necessary steps of setting up the frames and testing the installation to the first stage. Given the appropriate equipment, a little time and quality products such as those provided by Orton Baths, you will be capable of performing the installation and achieving a high-quality, sophisticated bathroom upgrade that will last the test of time.

To invest in a wall-hung toilet is not only the design, it is the necessity to make the bathroom a cleaner, more convenient, and more beautiful place to spend the next few years.
Copyright 2023 Orton Group | All Rights Reserved

Follow ORTONBATH on social media

Get in Touch

Feel free to drop us a line below!